This recipe can be done with any kind of cake you like. In fact, I started it the first time with remains of cake that I had. Later on I realised that I can do this recipe as well with brownies. I used a cake that has not butter but olive oil and can be served for many days keeping its moisture. Let's go...
Preperation time: 30' (totally)
Baking time: 45' (approximately)
Waiting time: 1 day (ideally)
Serves: 50 treats (depending on the molds you are about to use, With the chocolate molds that I used even 70 treats)
Ingredients
300 gr yogurt
170 gr olive oil
250 gr water
300 gr sugar
half tea spoon carbonated soda
2 tea spoons baking powder
half tea spoon salt
65 gr cocoa powder
260 gr plain flour
2 eggs gr (medium size)
1 tea spoon nutmeg powder
lemon zest (from 2 lemons)
For the coverage:
300 gr chocolare 55-57%
Preheat the oven
Put in a bowl all ingredients for the cake without the lemon zest and beat with a hand mixer until you mix all ingredients to fully homogenized. Your mixture will look like the one of crepes. Not thick. At the end add the lemon and mix to well incorporate.
Use a silicon mold or a dish covered with baking paper inside. Put the cake mixture inside, adjust it and bake it for 45'. You may check if your cake is ready with a wood stick.


Ideally you should make the little treats at least 3 days after having baked your cake. The cake basis should not be freshly baked. Nevertheless it will be very moist in a way that you will not need to use any ingredient further to make little balls. The cake itself is sufficient.
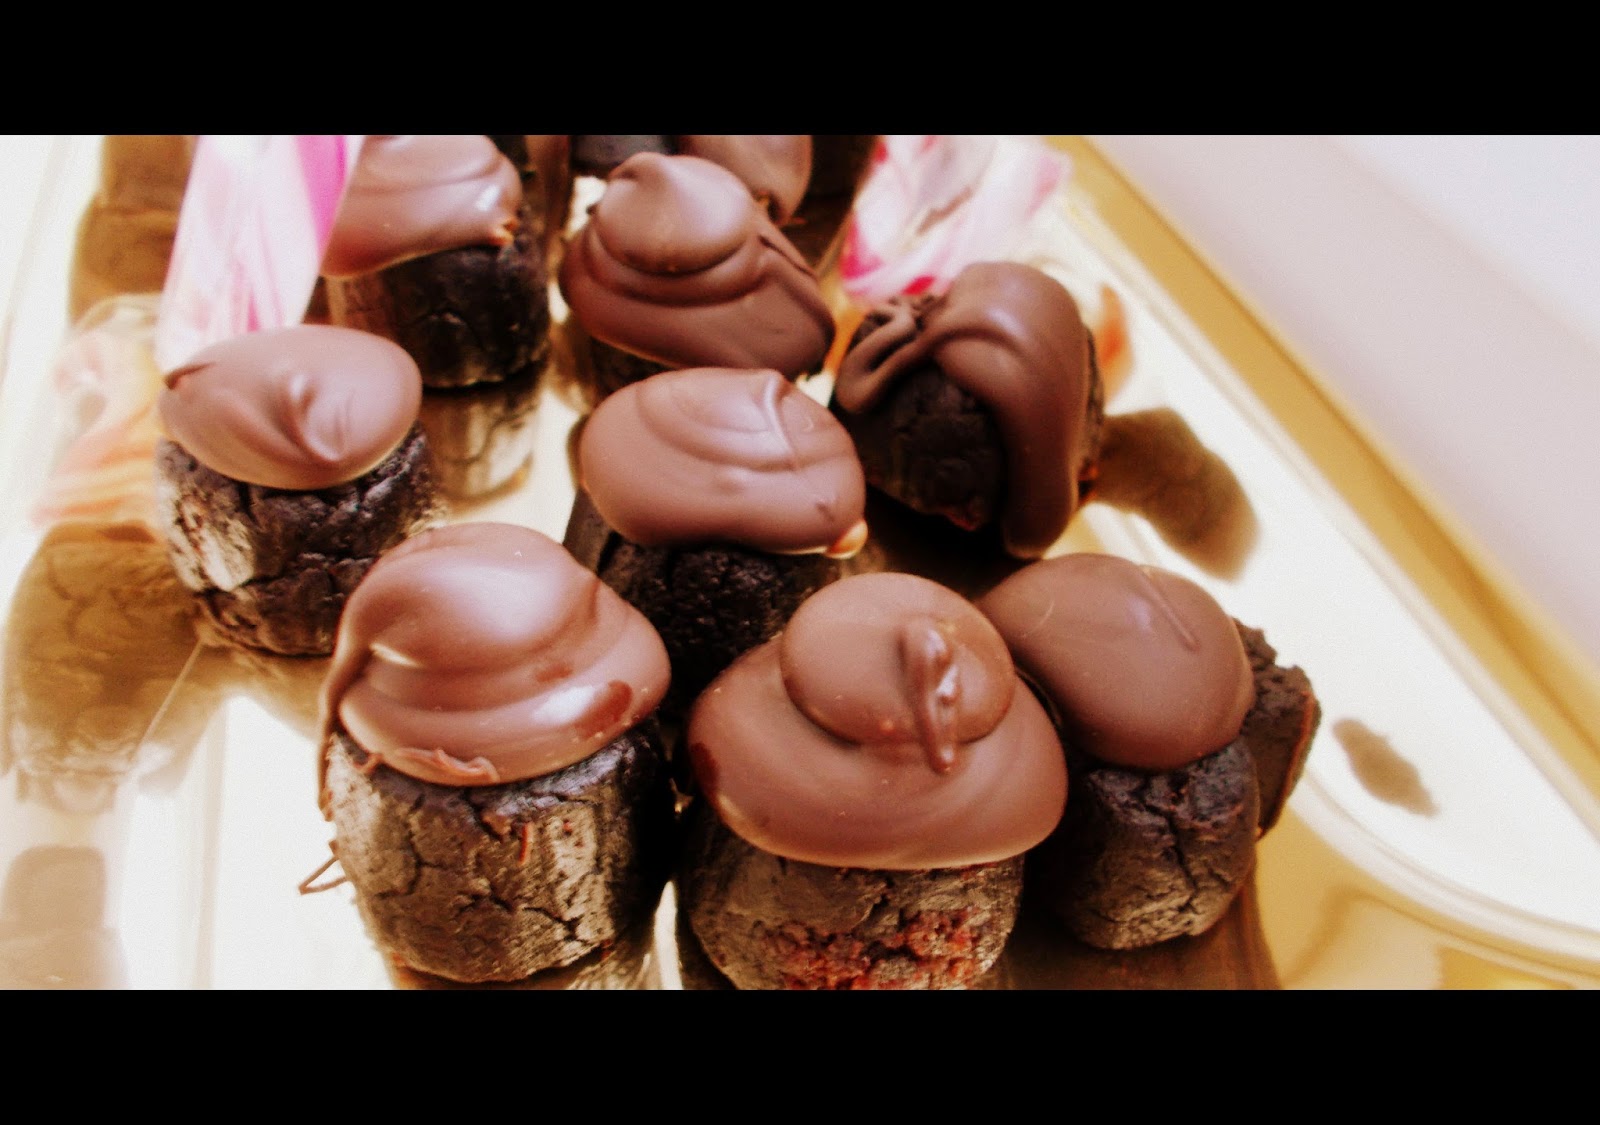
Just take little pieces of cake and mold them to your hand to have it approximately like in the picture. Depending always on the mold that you will use you adjust the size and and the way you make it in your hands.
Put in the refrigerator for at least 1 day so that they become really firm.


Take off the refrigerator and leave to room temperature. Ideally after 5-10 minutes they will be ready for the coverage. Moist and little cool.


Melt to bain marie the chocolate. Throw three quarters of the chocolate to a bowl and mix softly until it cools a little bit ( try chocolate in your lips and if it seems lukewarm or cool then it's ready). Then add the rest of the remaining chocolate and mix well until temperature is little cool (again test with lips). This is the quicker and easier for you to have a nice shiny chocolate on top. That's in fact one of the methods used to make chocolate keep bright and shiny texture while covering treats.


Tips
- You may prepare the cake many days before you wish to treat. One day before, take it off the refrigeration, prepare chocolate as described and ready to serve,
- If you don't want to use it all, you can split quantity of cake to your refrigerator (already in molds), depending on how many you wish to cover with chocolate and treat.
- As I said you can try any cake you like. An extreme idea would be to have different kind of cakes and make a combination of different tastes. For example, you could have a vanilla cake with orange, classic chocolate cake, possibly a brownie, vanilla cake with chocolate chips. fruit cake. Be careful though so that the cakes you chose are tasty but not dry. You need cakes keeping moist texture in order to easily mold them.
- Make little treats for birthday parties and for aperitifs with friends. They are festive, they last many days (if you don't eat them all!!!!!) and they look stylish I believe to your table. Enjoy!

Love,
Les Delices d' Eleni